
A payment processor is a transistor for financial calculations, technically an invertible currency exchange appointed by a merchant to handle transactions from various channels such as credit cards and debit cards.
Front-end processors have connections to various card associations and supply authorization and settlement services to the merchant banks' merchants. Once the payment processor has received confirmation that the credit card details have been verified, the information is relayed back via the merchant's payment gateway, then completing the payment transaction.
For charging for Rental business, Rentrax software supports flexible payment ways, and you can choose to configure to use them when required and enable card-present payment as "YES."
1. If you have your payment system, Rentrax calculates the amount due according to the rental orders. You can charge the customers using your own devices.
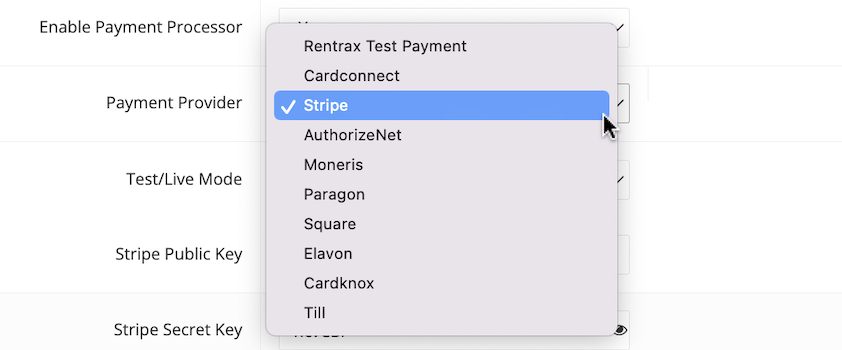
2. If you don't have any payment service provider, Rentrax offers you to pick one of them. Rentrax integrates seven payment service providers:
-
- Stripe.com (operating worldwide)
- Cardconnect.com (operating in the USA only).
3. Contact one of these providers to set up an account and enable credit card processing for card-present or online card payment; once an account is open, login into the merchant account to get the Keys for the particular payment providers.
NOTE: Finding keys from the merchant account may vary from provider to provider.
Here Keys is nothing but Sandbox Keys & Production Keys. These keys are helpful to connect the Rentrax platform to the Payment provider gateway.
- Sandbox Keys (TEST Mode): Change your Mode to Test and enter the Sandbox keys when you want to test the Rentrax platform. Make sure that every transaction (Paid, Refund) made through Rentrax is reflected on the Payment gateway.
- Production Keys (LIVE Mode): Change your Mode to Live and enter the Live keys when you decided to go live and are ready to start accepting the live orders. When the credit card details entered by the end user have been verified, the information is relayed back via the payment gateway to the merchant, who will then complete the payment transaction.
Note: Before purchasing new hardware from your payment processing company, ensure that it's compatible with Rentrax.
Sections we Covered in this article:
Stripe:
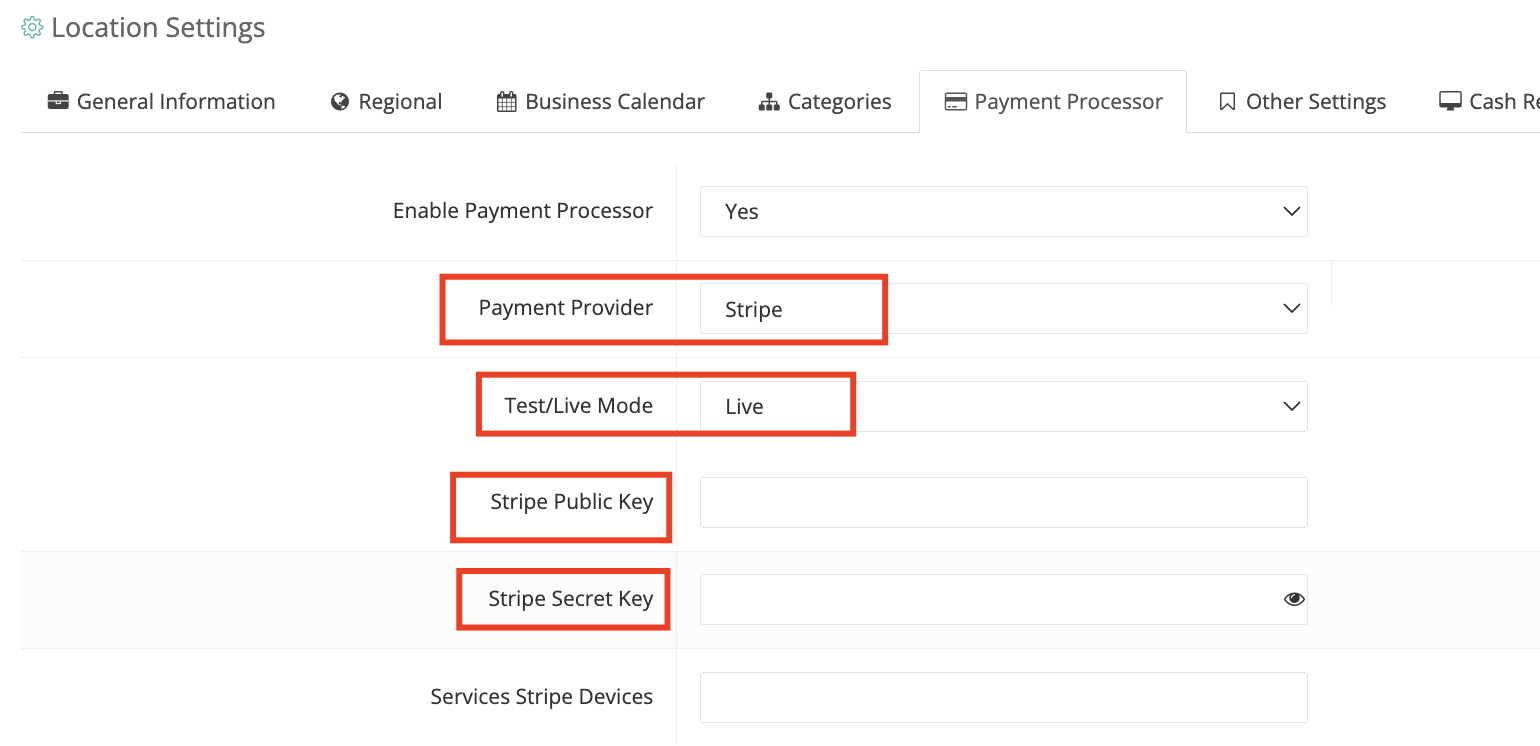
To connect your Stripe account and enable live mode navigate to the Location setting, Payment Processor and follow the steps below:
- Choose the stripe from the Payment Provider drop-down list.
- Put the Test/Live Mode on Live
- Log in to your Stripe website merchant account and pick the Stripe Public key and Stripe Secret Key
- If you need to connect the payment terminal to Rentrax as well you can enter the device number in The Service Stripe Devices box and you can use commas to distinguish them
CardConnect:
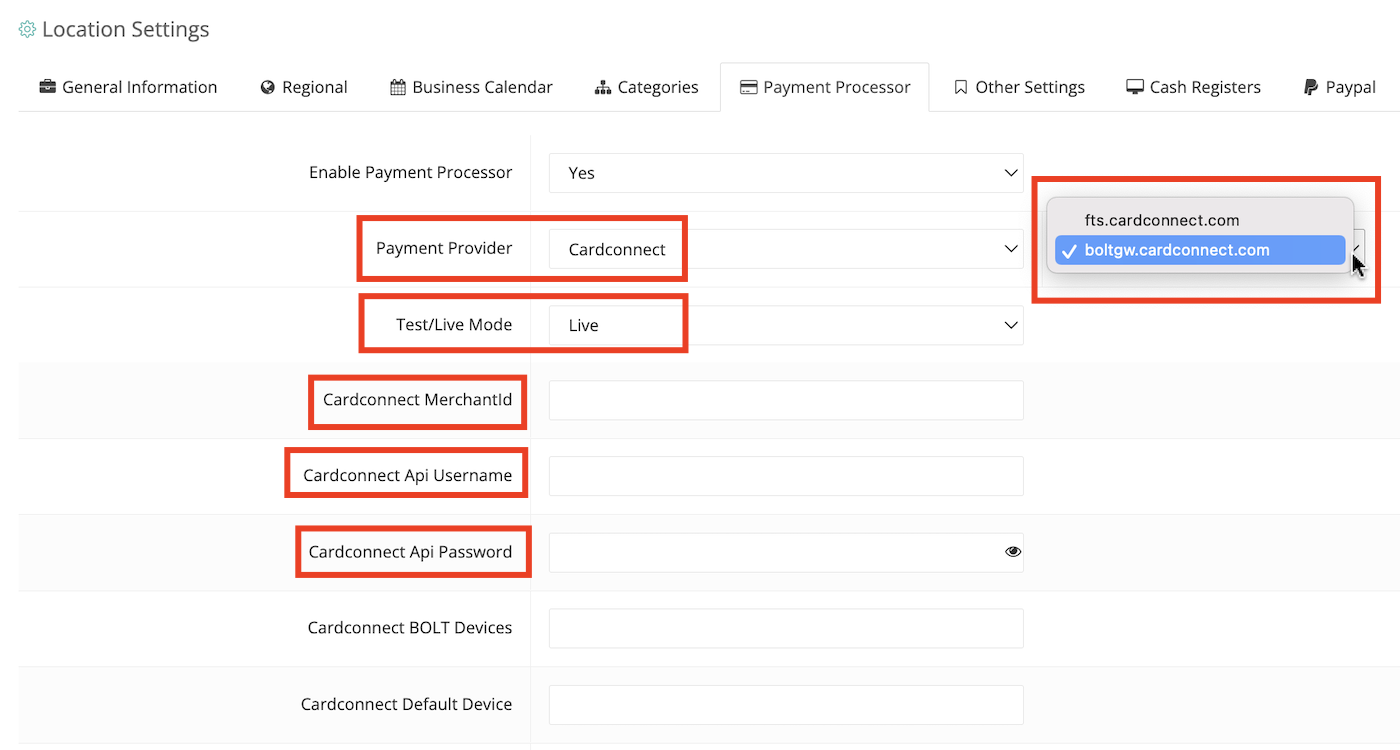
- Choose CardConnect from the Payment Provider drop-down list.
- Put the Test/Live Mode on Live
- Log in to your Card connect website merchant account and pick the
- Card connect Marchant id
- Card connect API Username
- Card connect API Password
- Connect payment terminals: Enter your device ID
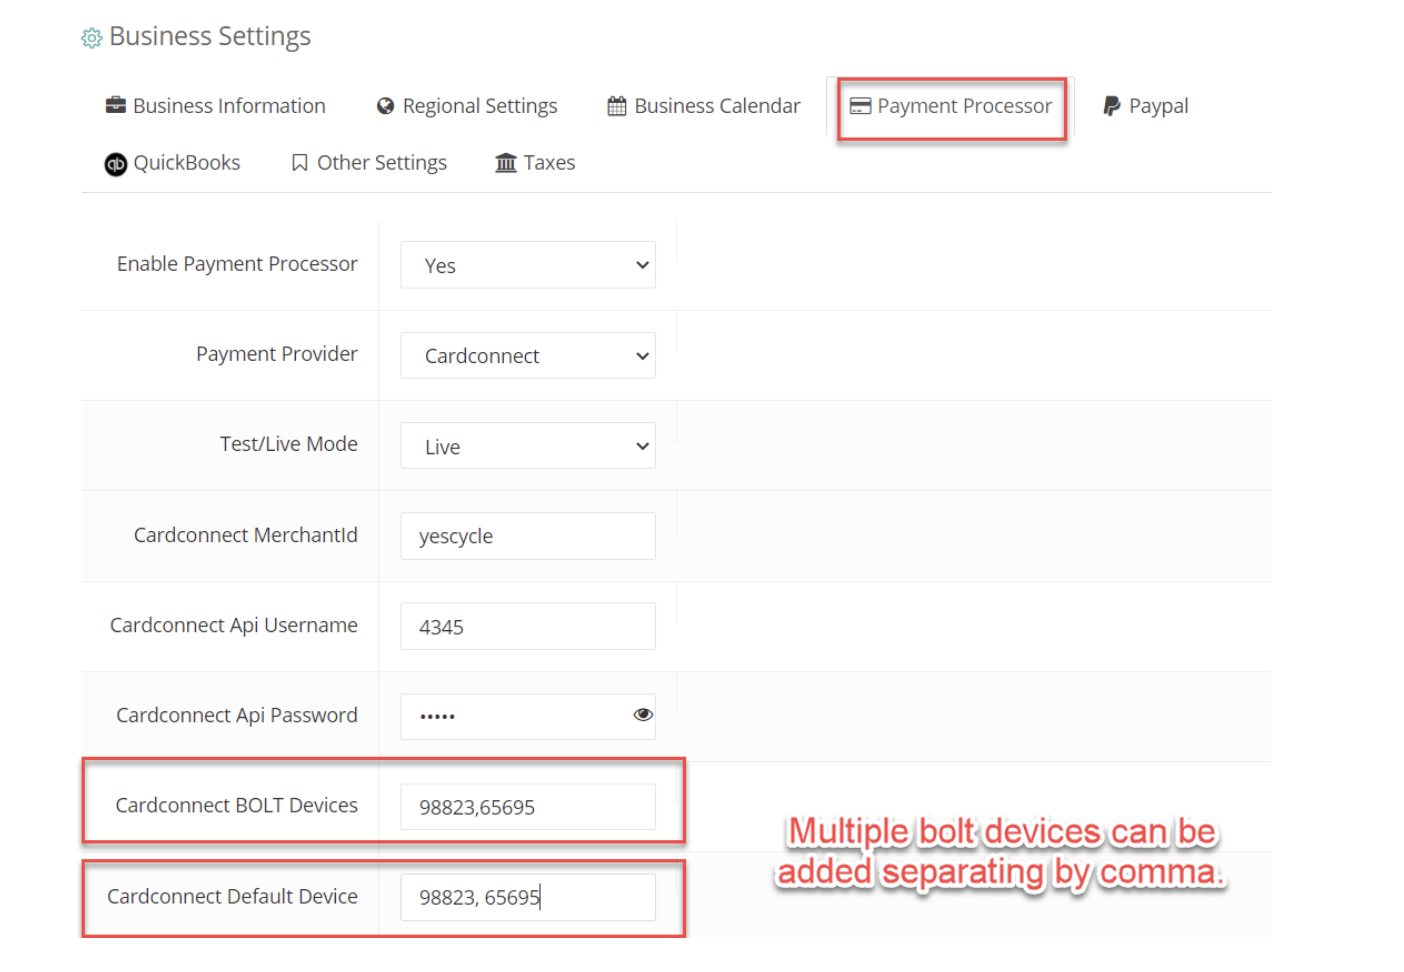
- Card connect BOLT Devices(The Bolt Terminal solution is a cloud-based integration that makes it quick and easy to add secure payment acceptance to any point-of-sale application. With a suite of terminals equipped with EMV and contactless payment technologies and point-to-point encryption, you can offer quick and secure payments to your customers.)
- Card connect Default Device: The ID you enter here will be considered as default device
Authorize.Net:
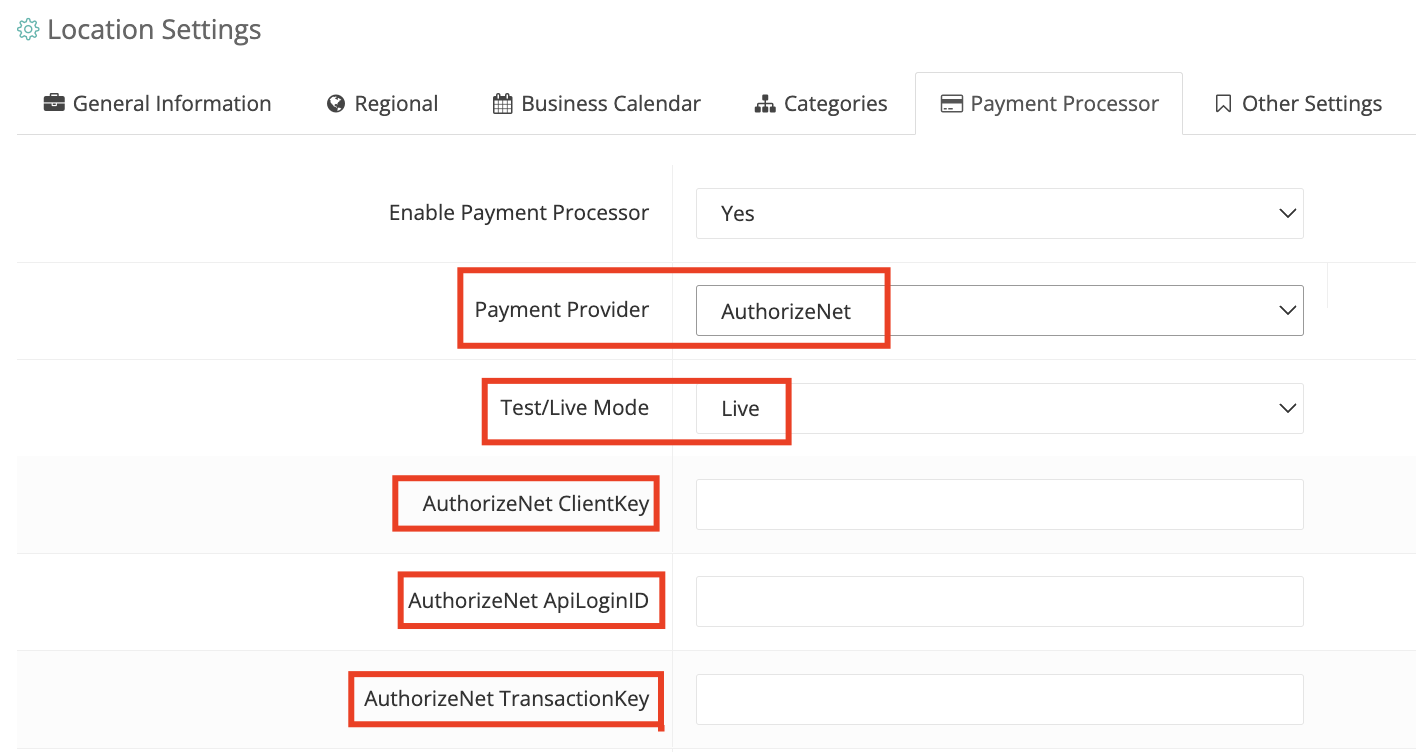
- Choose Authorize.Net from the Payment Provider drop-down list.
- Put the Test/Live Mode on Live
- Log in to your Authorize.Net website merchant account and pick the
- Authorize.Net ClientKey
- API Login ID
- Transaction key
- Rentrax does not support terminal for this payment processor
Moneris:
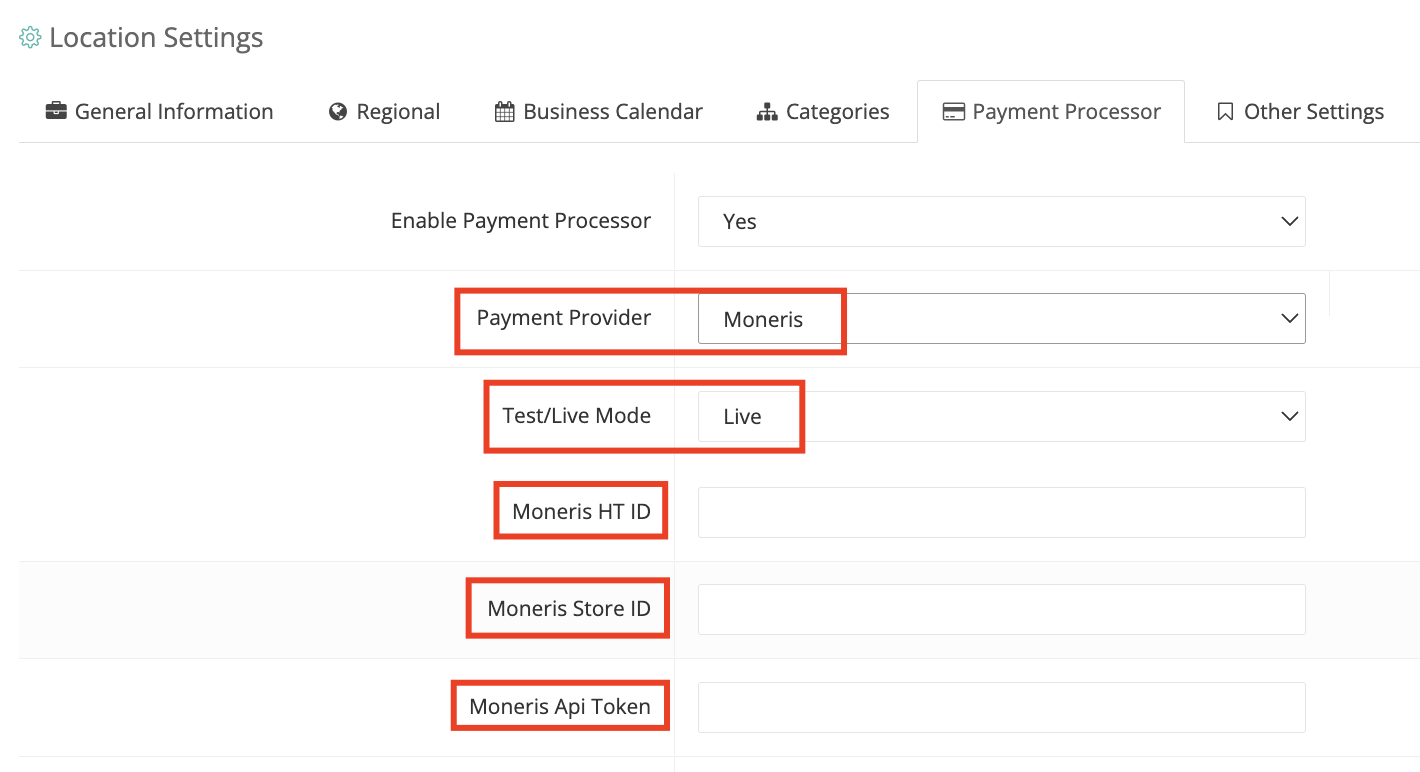
- Choose the Moneris from the Payment Provider drop-down list.
- Put the Test/Live Mode on Live
- Log in to your Moneris website merchant account and pick the
- Moneris HT ID (Moneris Hosted Tokenization ID)
- Moneris Store ID
- Moneris API Token
- Rentrax does not support terminal for this payment processor
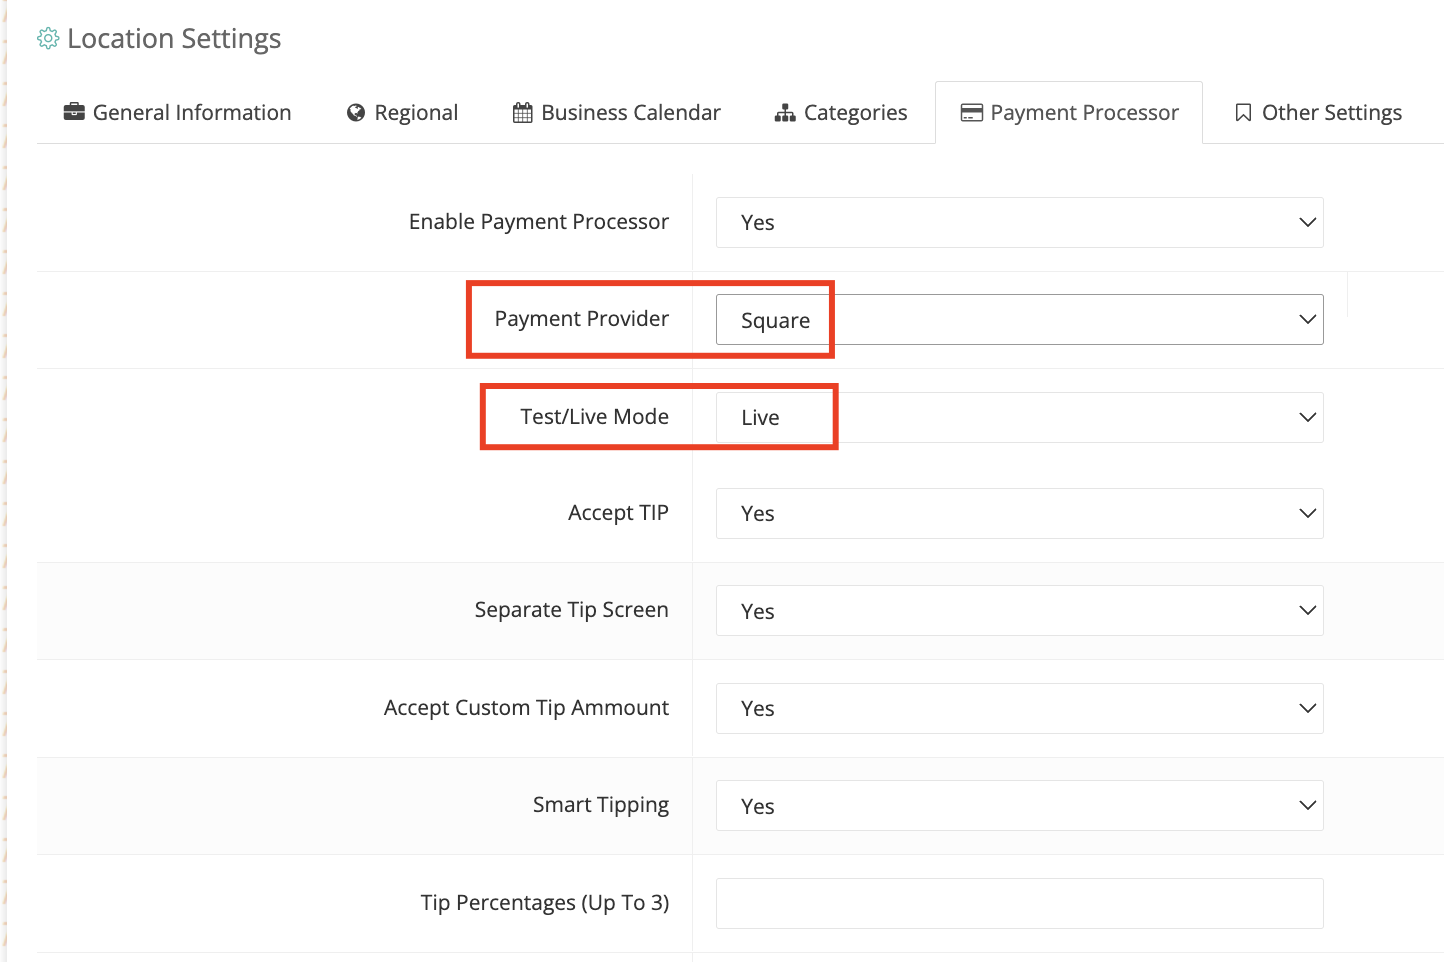
Square:
- Choose the Square from the Payment Provider drop-down list.
- Put the Test/Live Mode on Live
- Click on save
a Square tab will appear:

4. Click on connect and it will redirect you to the Square site, you need to log in and give access to rentrax through the square website.
How to connect the square terminal to Rentrax:
Important note: Before doing the set up you need to notify your client support agent to enable Device integrated payments
Here are the steps help you to connect the square device to Rentrax:
-
Your device needs to be connected to the internet
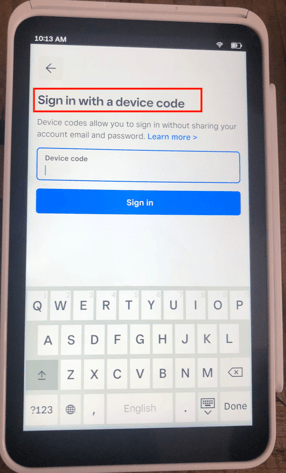
- Click on Sign in

-
Choose login by code on the square device
-
Open the Square tab in location settings and then click on the green button "get the device code"
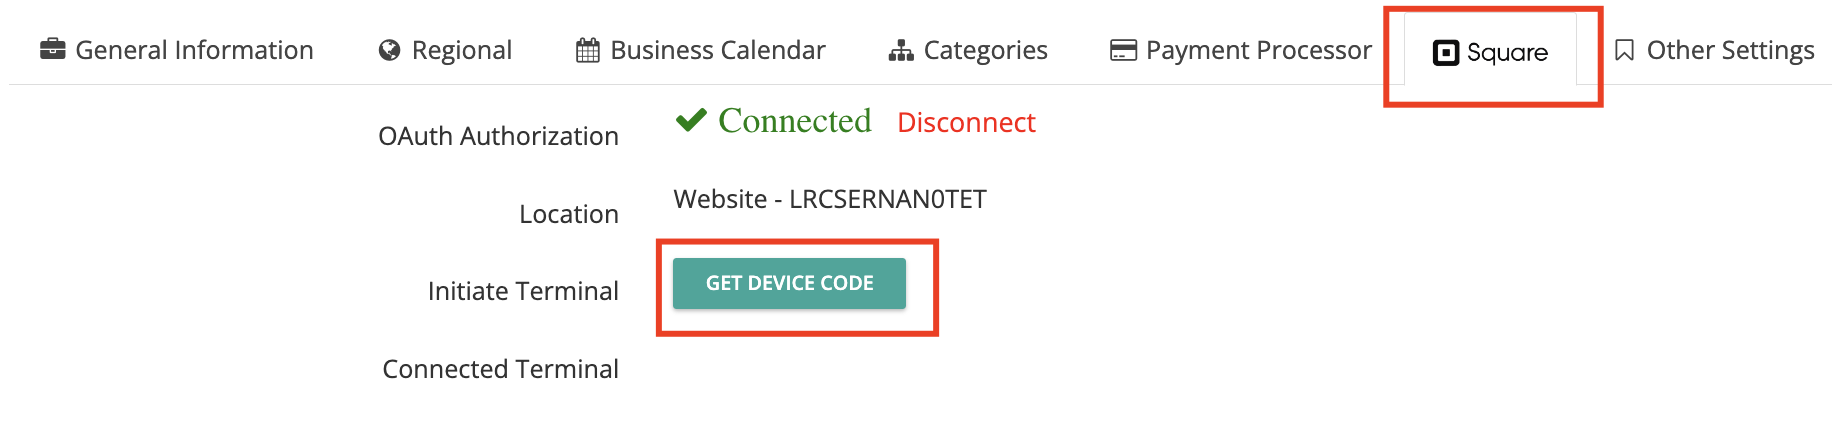
-
Use this code that appears on rentrax to log in on your square device
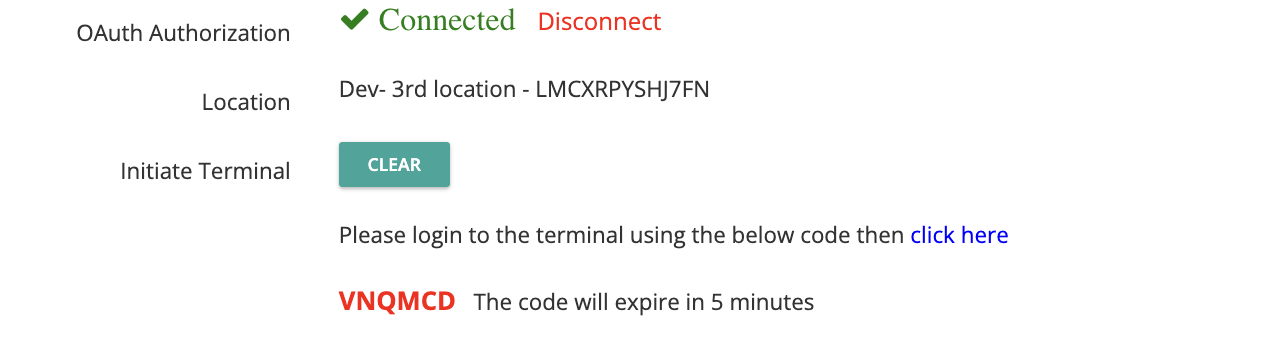
-
The screen of the square device will turn black
-
At the same time, the rentrax page will be refreshed and "the device number" will be shown there
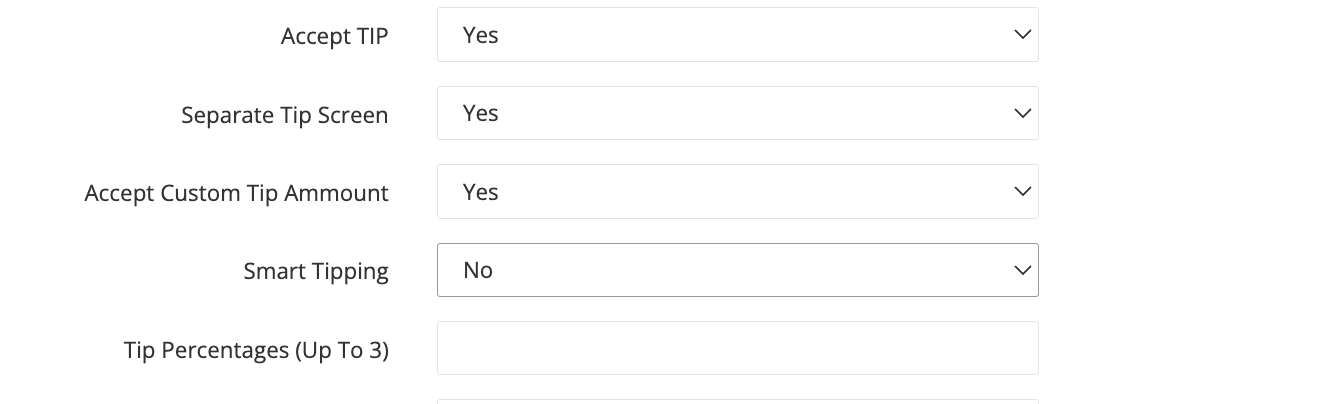
Accepting Tip settings:
If you decided to accept the tip on your square terminal you need to put the Accept Tip on yes.
if you choose Smart Tipping the rates would be square default rate:
- If a transaction is less than $10, the available tipping options are No Tip, $1, $2 or $3.
- For a transaction equal to $10 or more, the available tipping options are No Tip, 15%, 20% or 25%.
If choose to not use smart tipping you can put up to 3 numbers in the Tip Percentage and divide them by a comma, like 10, 20, 30
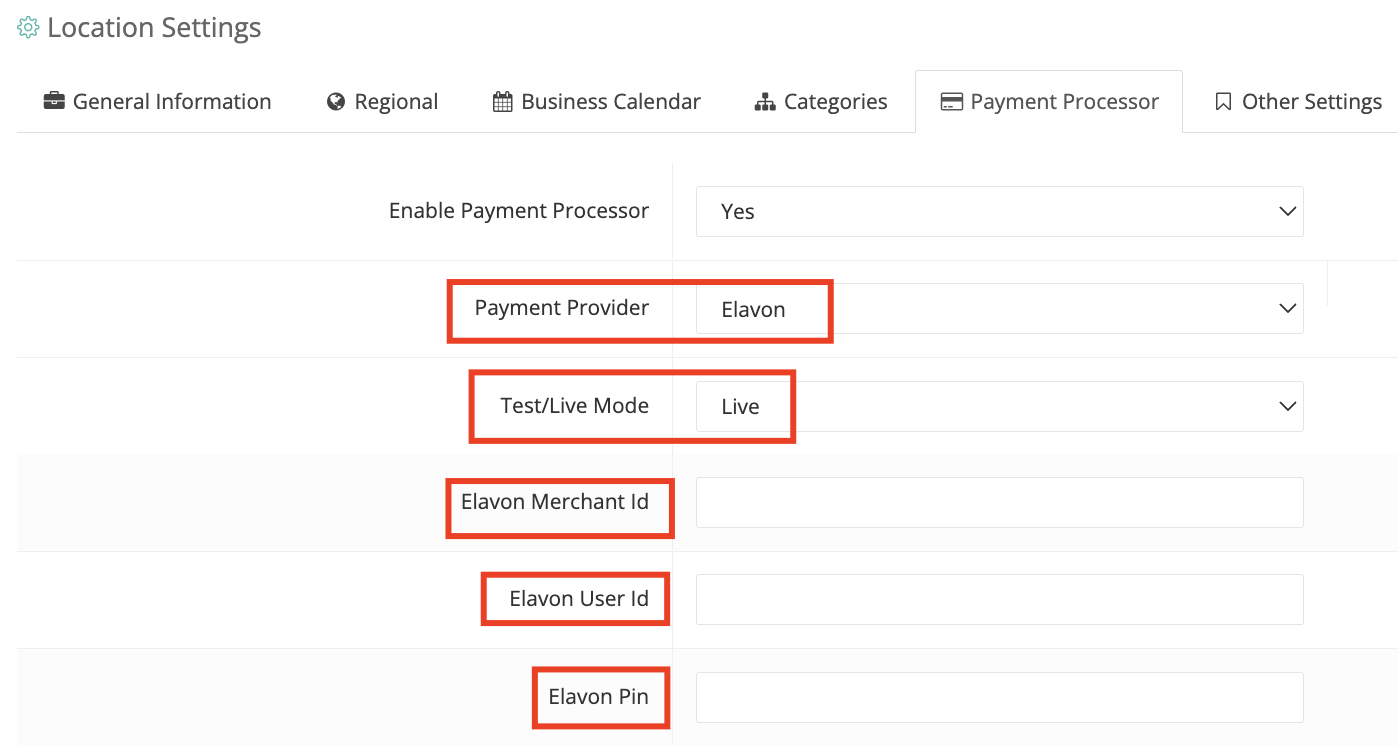
Elavon
- Choose Elavon from the Payment Provider drop-down list.
- Put the Test/Live Mode on Live
- Log in to your Elavon website merchant account and pick the
- Elavon Merchant Id
- Elavon User Id
- Elavon Pin
4. Rentrax does not support a terminal for this payment processor
Till
- Choose the Till from the Payment Provider drop-down list.
- Put the Test/Live Mode on Live
- Log in to your Till website merchant account and pick the
- Till Api Key
- Till Shared Secret
- Till Shared Secret
- Till Public Integration Key
- Till API Username
- Till API Password
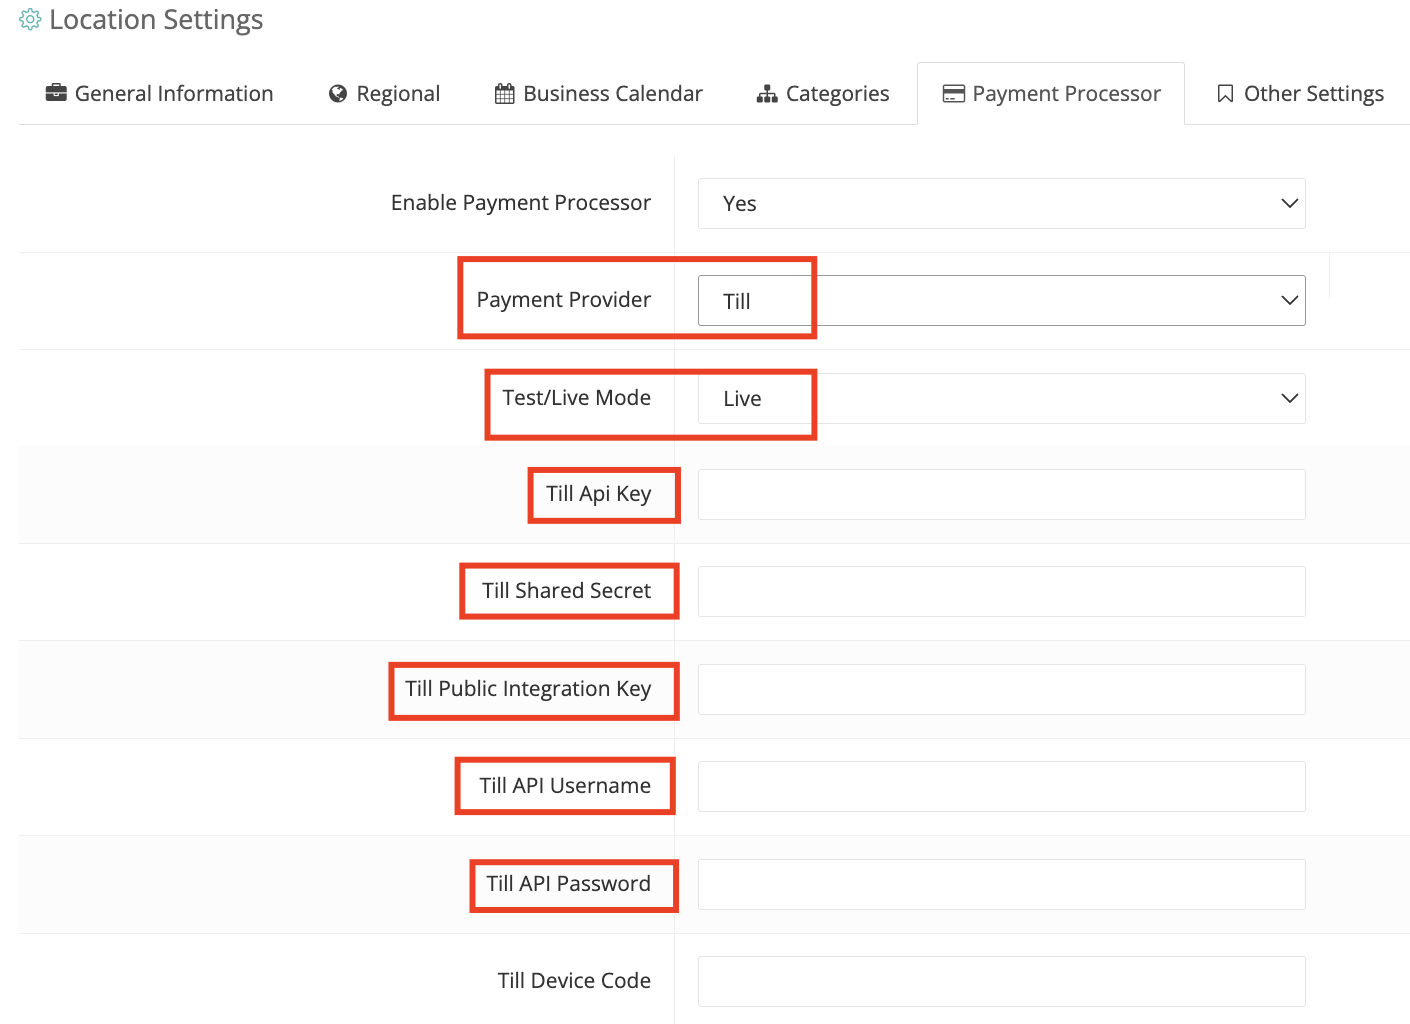
4. To connect the Till terminal enter the Device Code
Cardknox
- Choose the Cardknox from the Payment Provider drop-down list.
- Put the Test/Live Mode on Live
- Log in to your Till website merchant account and pick the
- Software XKey
- Iframe XKey
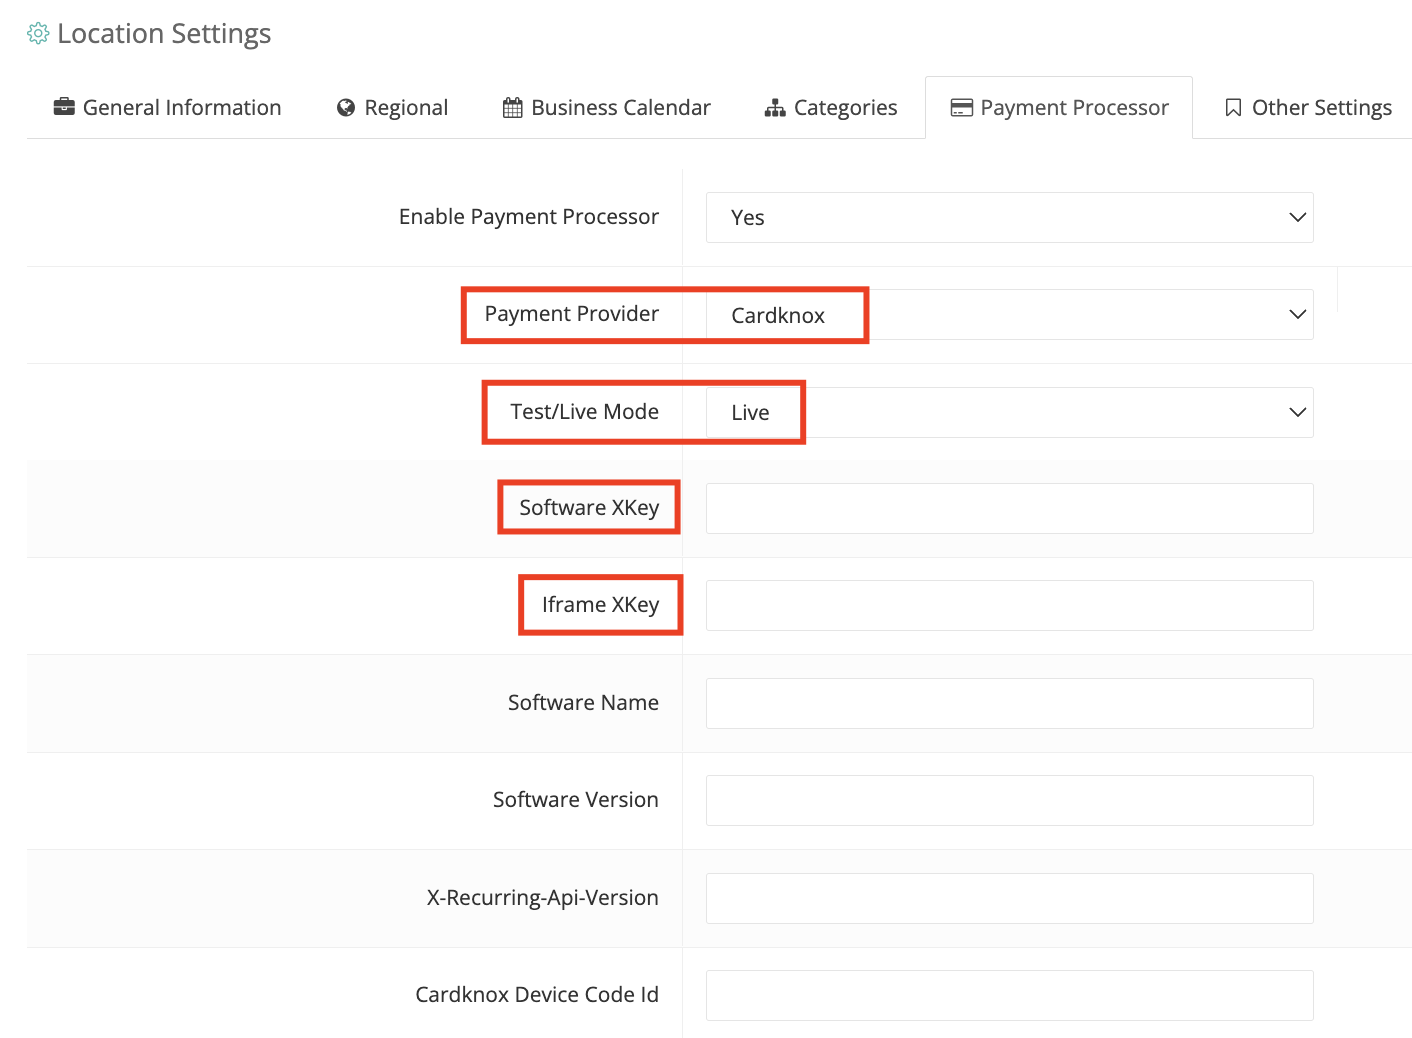
4. For the Software Name, Software Version and X-Recurring-Api-Version enter the following information as shown in the picture.

5. To connect a payment terminal enter the device ID in form of the Cardknox Device Code Id
Paragon:
- Choose the Paragon from the Payment Provider drop-down list.
- Put the Test/Live Mode on Live
- Log in to your Till website merchant account and pick the
- Paragon HP Plus Key
- Paragon API Username
- Paragon API Password
- Paragon Gateway ID


4. To connect the payment terminal enter the device Id for the Paragon devices (multiple devices can be separated by a comma)
To specify one of the devices as the default input the Id in front of the Paragon Default Device
5. To enable the using walk-in Kiosk enables the Use MAGTEK Device In Walk-In Kiosks

Remember to click on the SAVE button to keep all your settings changed.